Welcome!

Big steps towards control
TL;DR; - IMU and Battery data is now a pi_control topic. A new command gui with the help of AI! The URDF model is now properly configured and labeled for RViz. Standing up Gazebo Sim only mode is proving to be a challenge
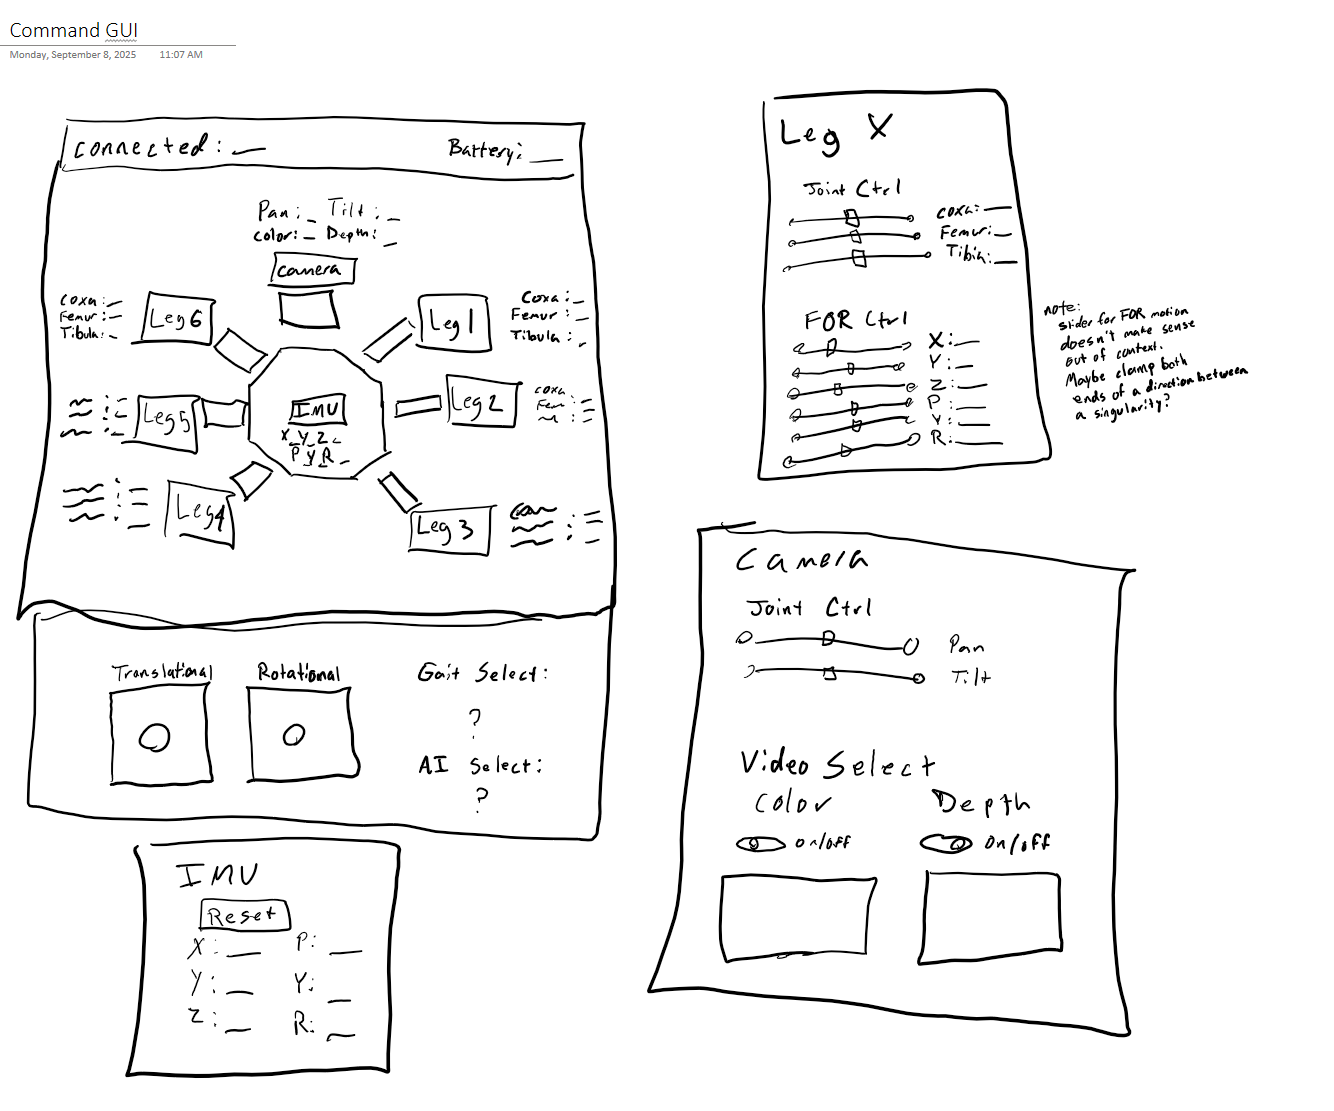
The new command gui
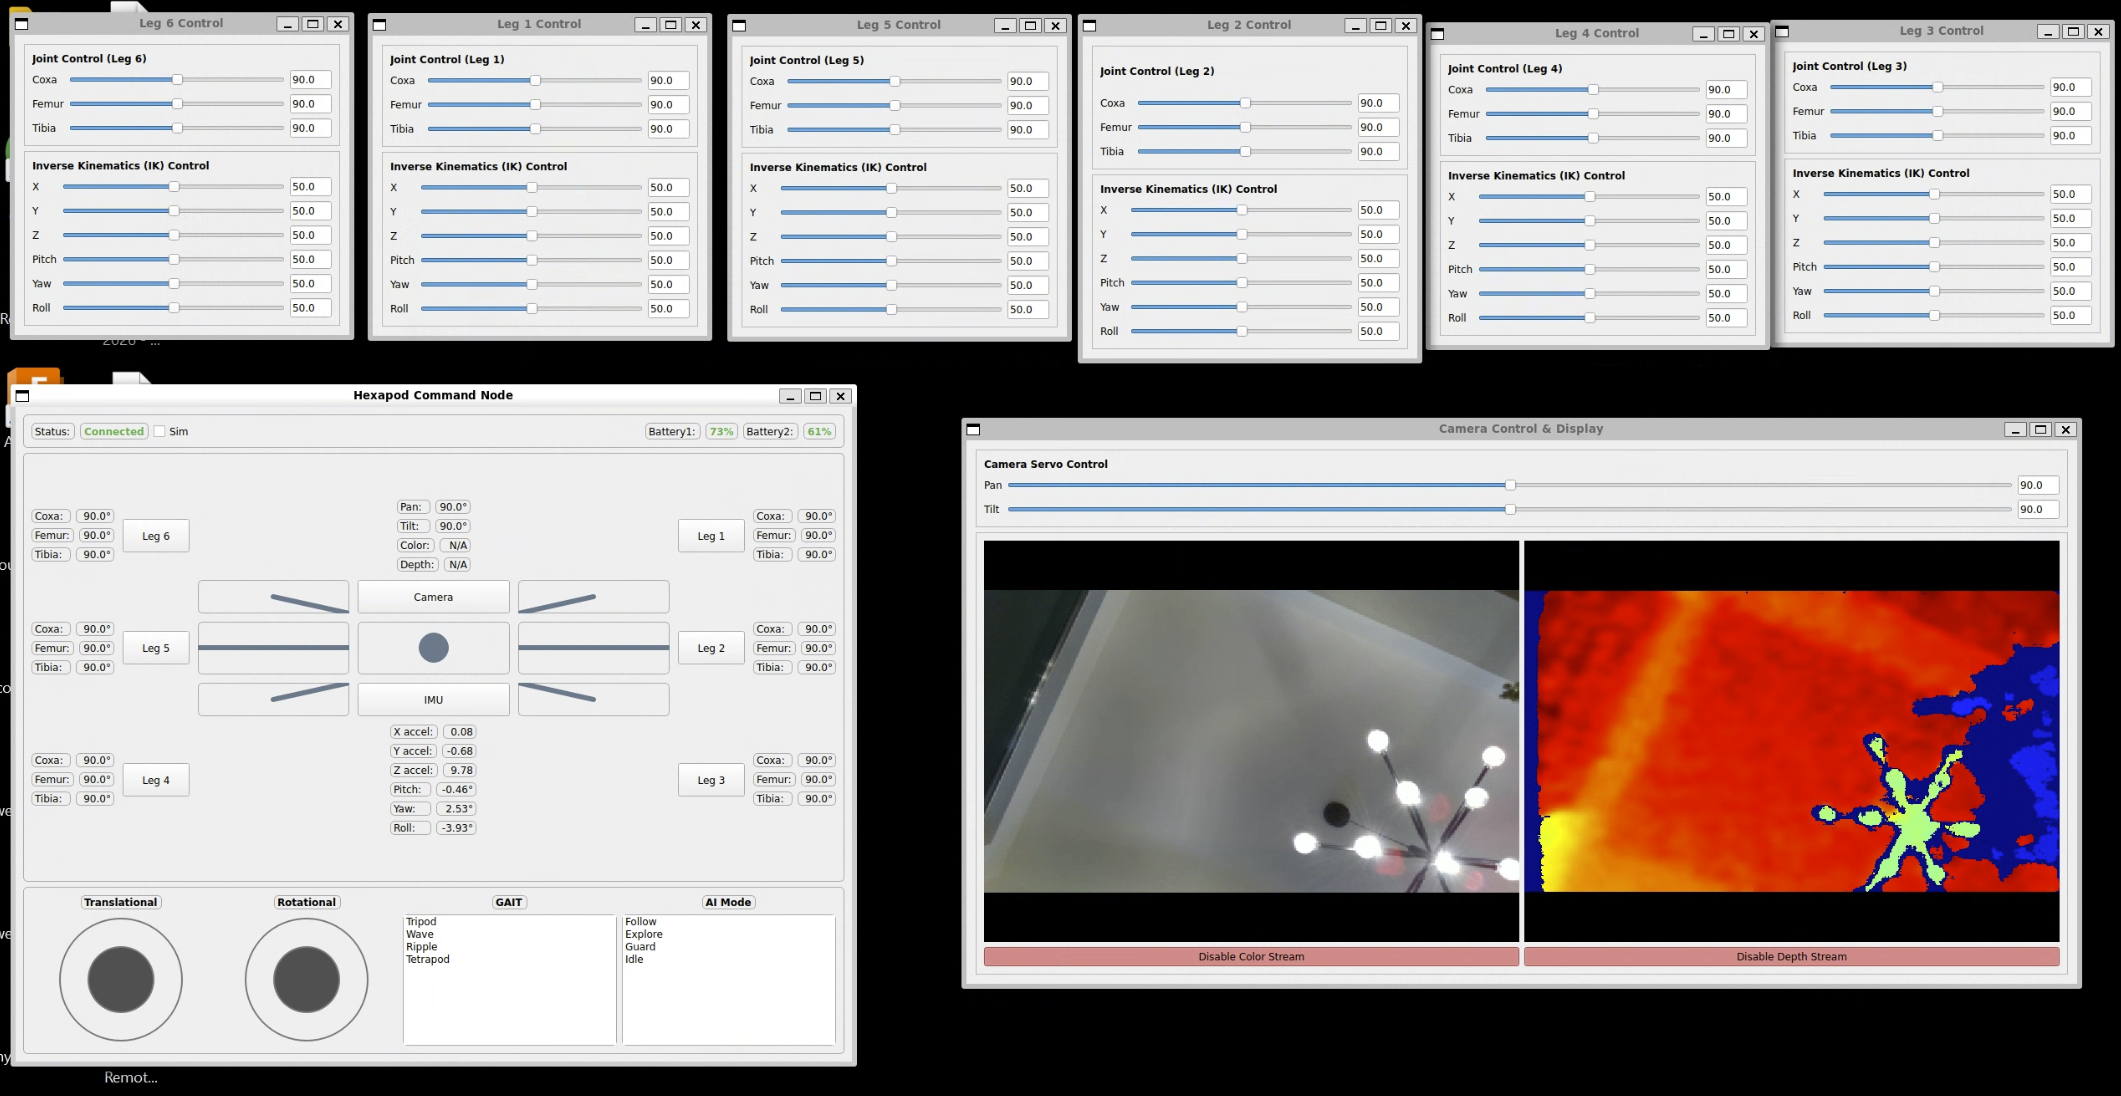
Creating the gui I’ve had in my head for a couple of weeks only took literally a couple of hours with the help of an LLM. The first hour was spent on doodling a wireframe. I use OneNote to doodle on my 2-in-1 laptop, but pen and paper work too!
In practice I’ve learned that LLM are 50X productivity enhancers IF the user knows how to define exactly what they want and how they want it. More times than not, the single-shot perfect prompt happens when it’s something that I’ve done several times before. This time it was rigging up a whole bunch of PyQt5 widgets/frames/layouts/callbacks etc. I could have easily spent 50-60 hours making this GUI from scratch, but with a prompt (that I thoughtfully put together for my LLM), the assistant was able to compile a 700+ line file that met all my expectations.
Publishing IMU and Battery Health Data
I was putting this off until recently one of my LiPo’s died (for good). I think my robot was draining the cells a bit too far and LiPo’s are expensive lol. So I decided to spend a few hours on hooking this up to the new GUI. I reused the IMU and ADC (Analog to Digital Converter) drivers that came with the kit. For both, I’m using BatteryState and Imu from msg and filling in existing standard parameters. In the IMU, there is a Kalman filter that get’s rid of any noise from the accelerometers. The IMU data I am publishing are x, y, z, pitch, yaw, roll, but I’m expecting my kinematic algorithms will be using quartonians. The Battery health data is for “two” batteries and the health is percentage from the current voltage value normalized over peak health and 6v which is typically the lower limit for 2S battery pack.
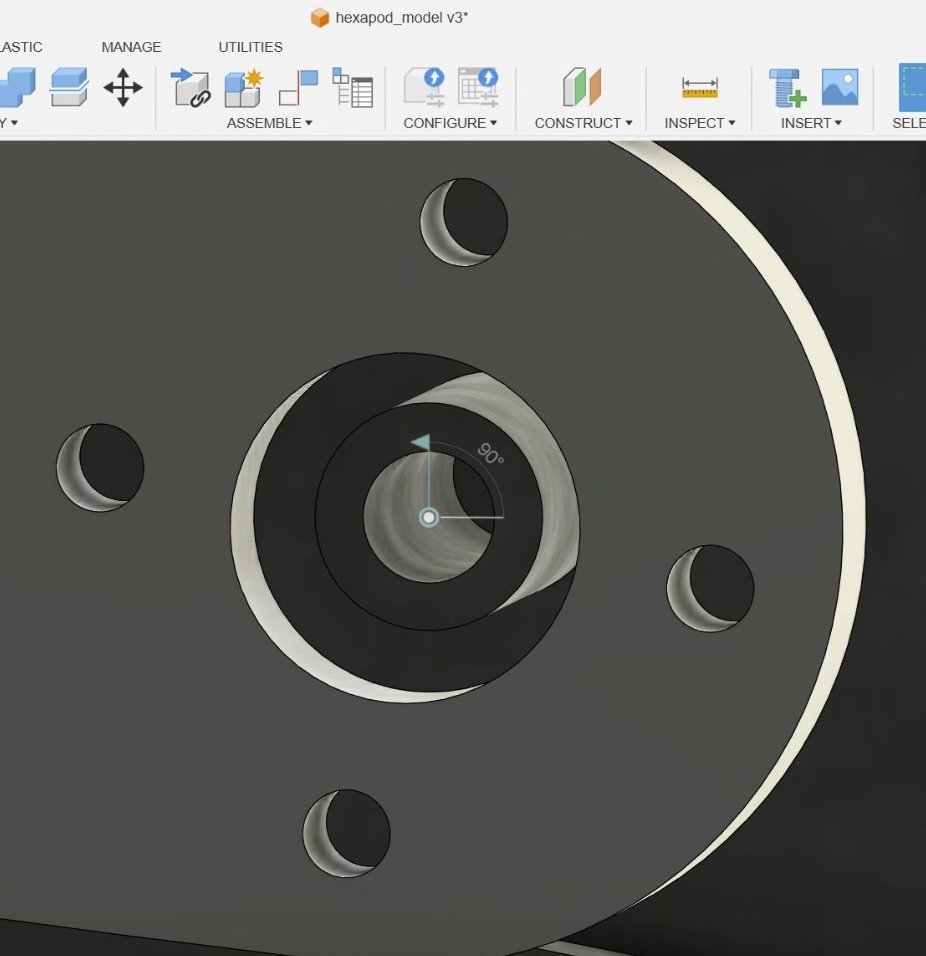
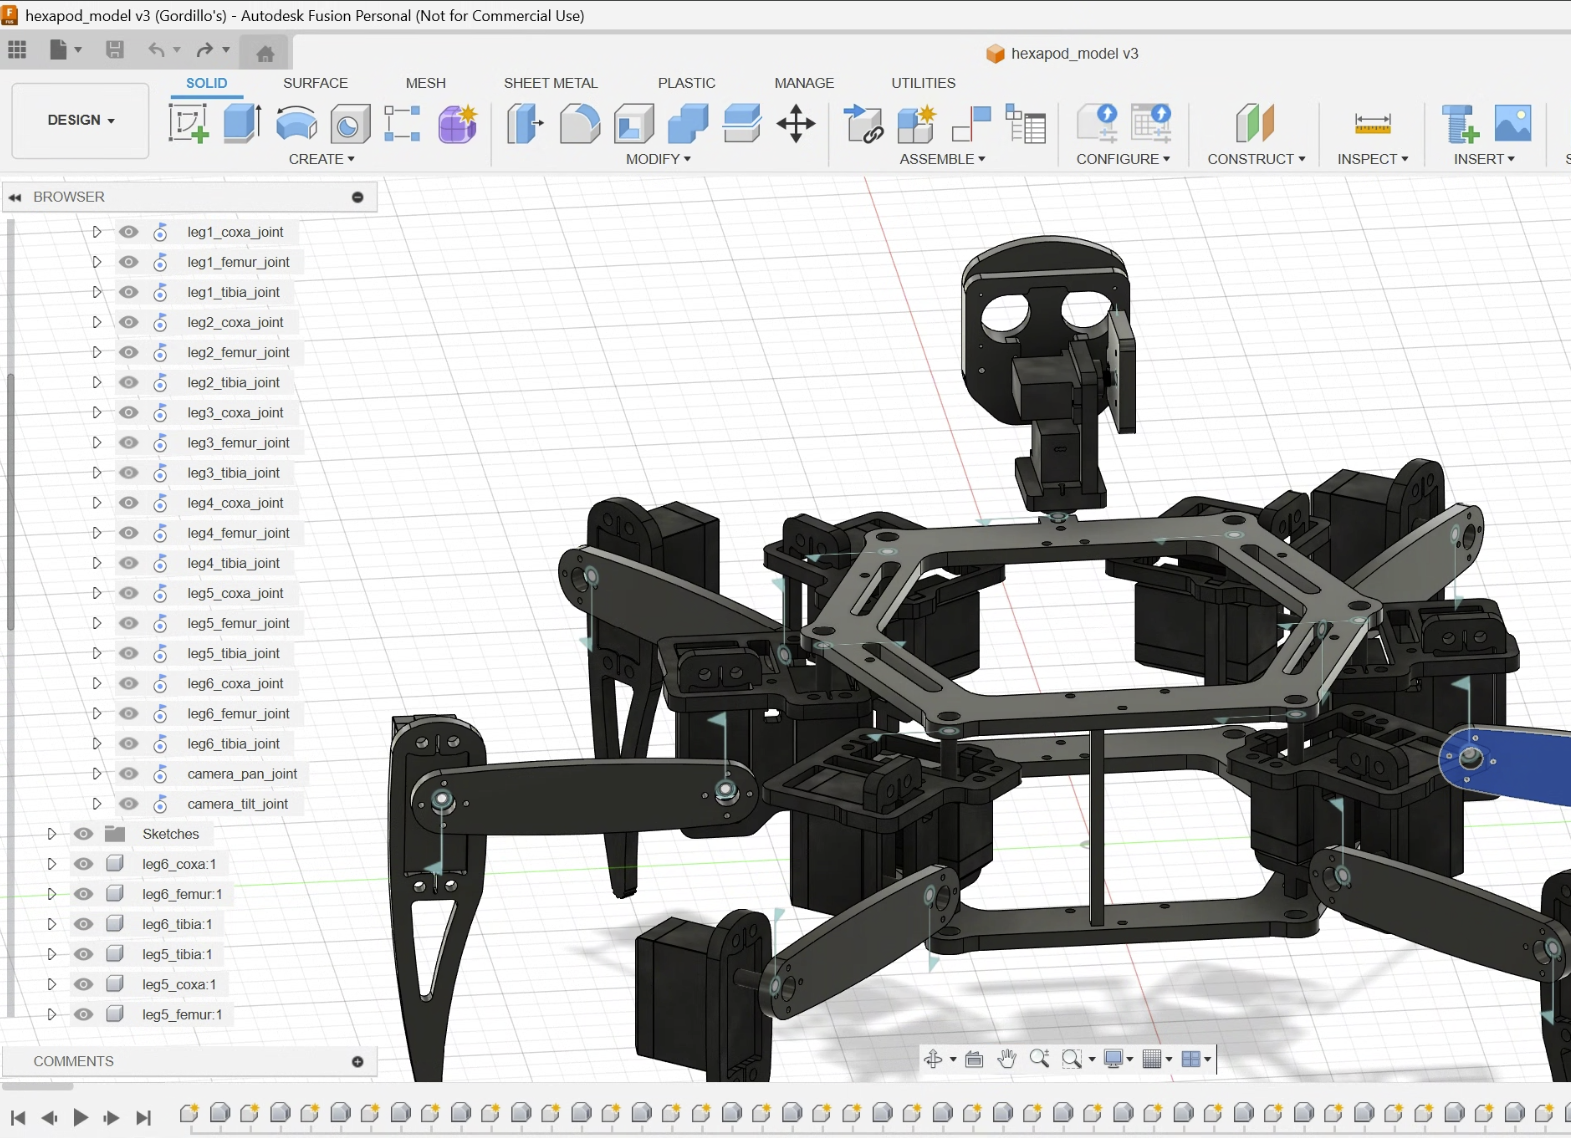
Tips/Tricks for Fusion360 proper URDF exports
I’ve learned that when setting up joints in your model, what matters (actually matters) is making sure that your whole model is oriented correctly. Z-up, X-forward. That joints Component2 is the parent. When setting up the joint, make sure the values is 0 and most importantly, do not try to fix anything if you see a ‘joint_drive’ value in Fusion. This is normal and will not impact the export.
Another important note is renaming your joints to something you will be using throughout all of your code. So, I did end up going with insert body parts -__- (coxa, femur, tibia). Also saving your file to be all lower case will avoid a warning message when colcon builds your package. and lastly naming your links (components) with a similar convention to your joints will help your code if you choose to use a dictionary with a smart look up table.
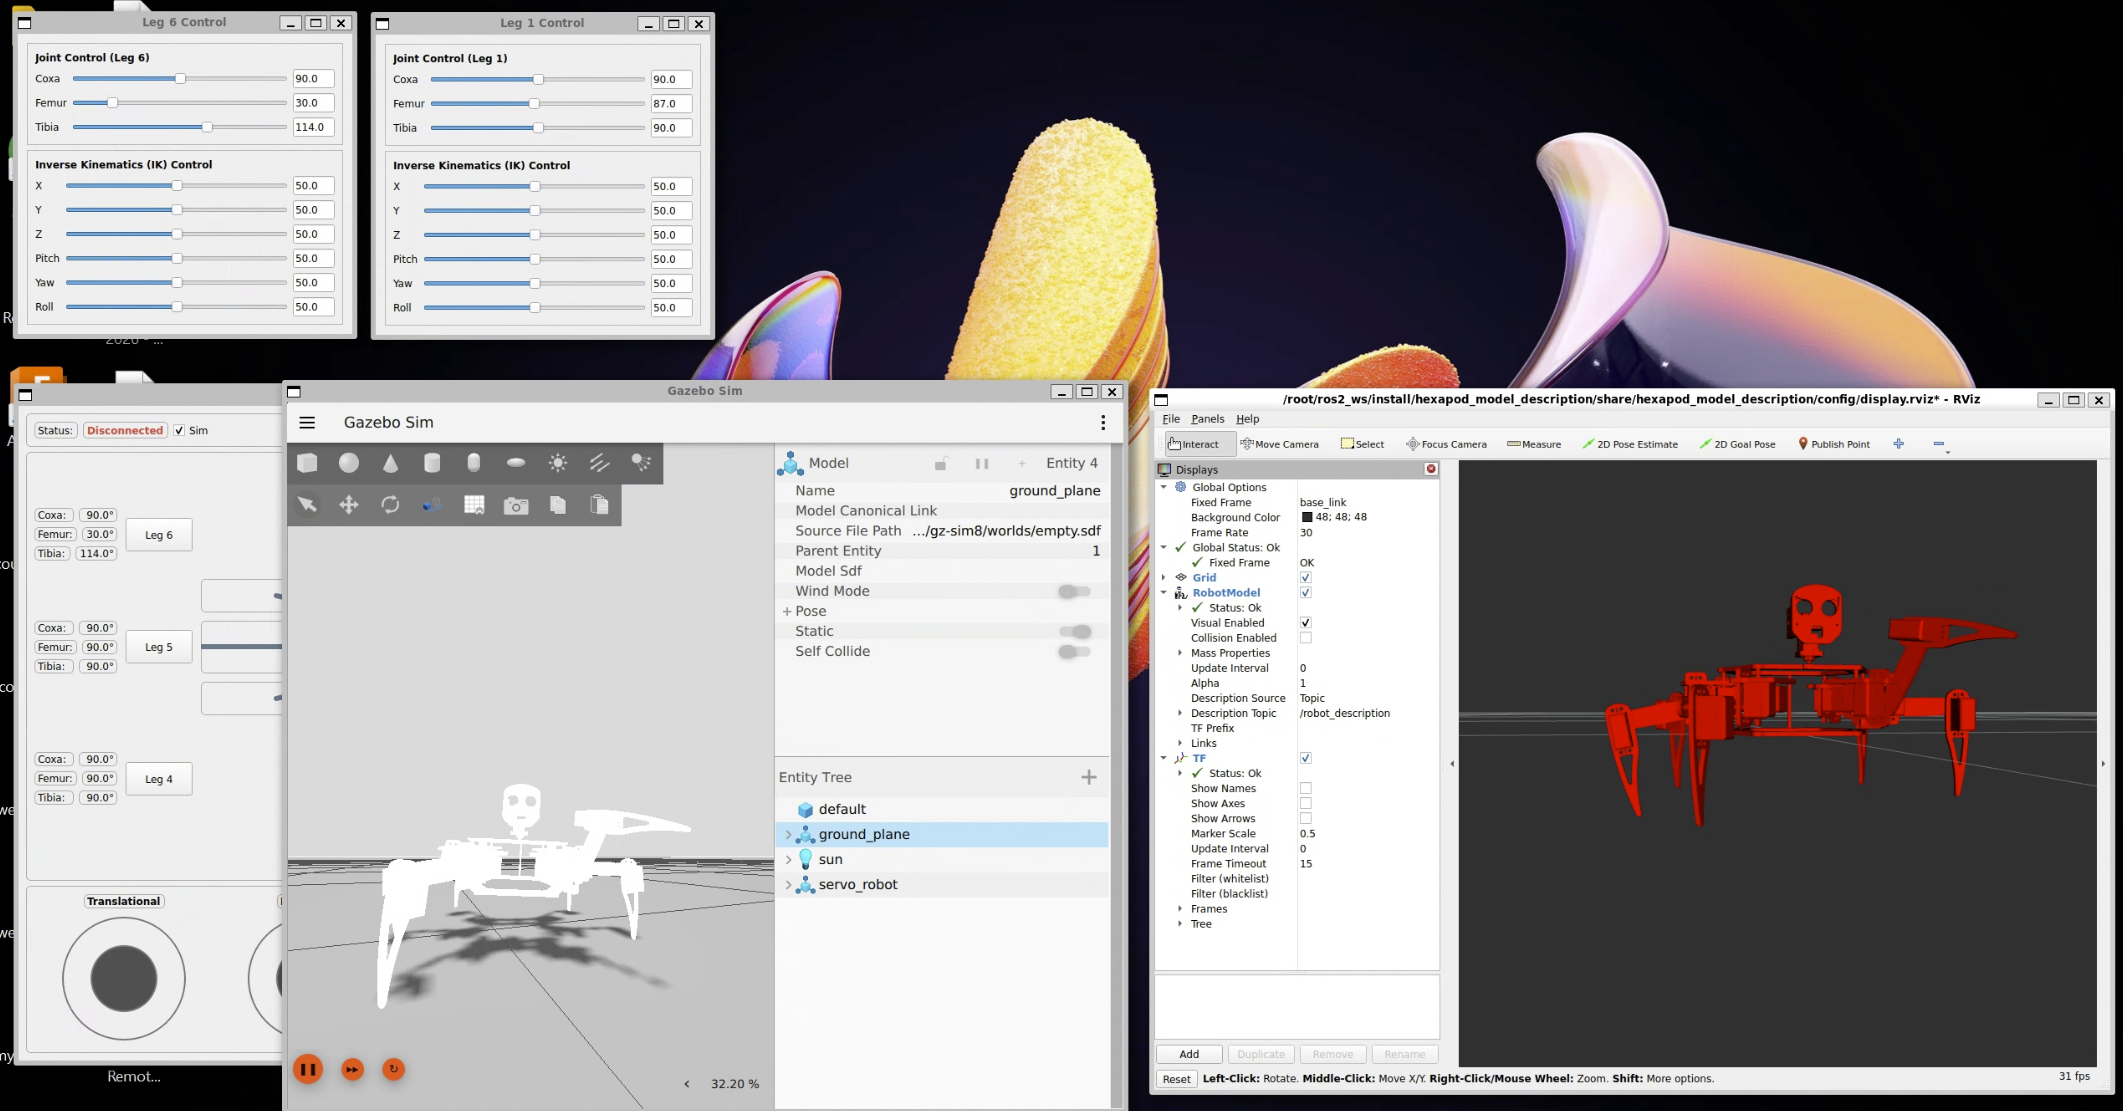
Joint publisher
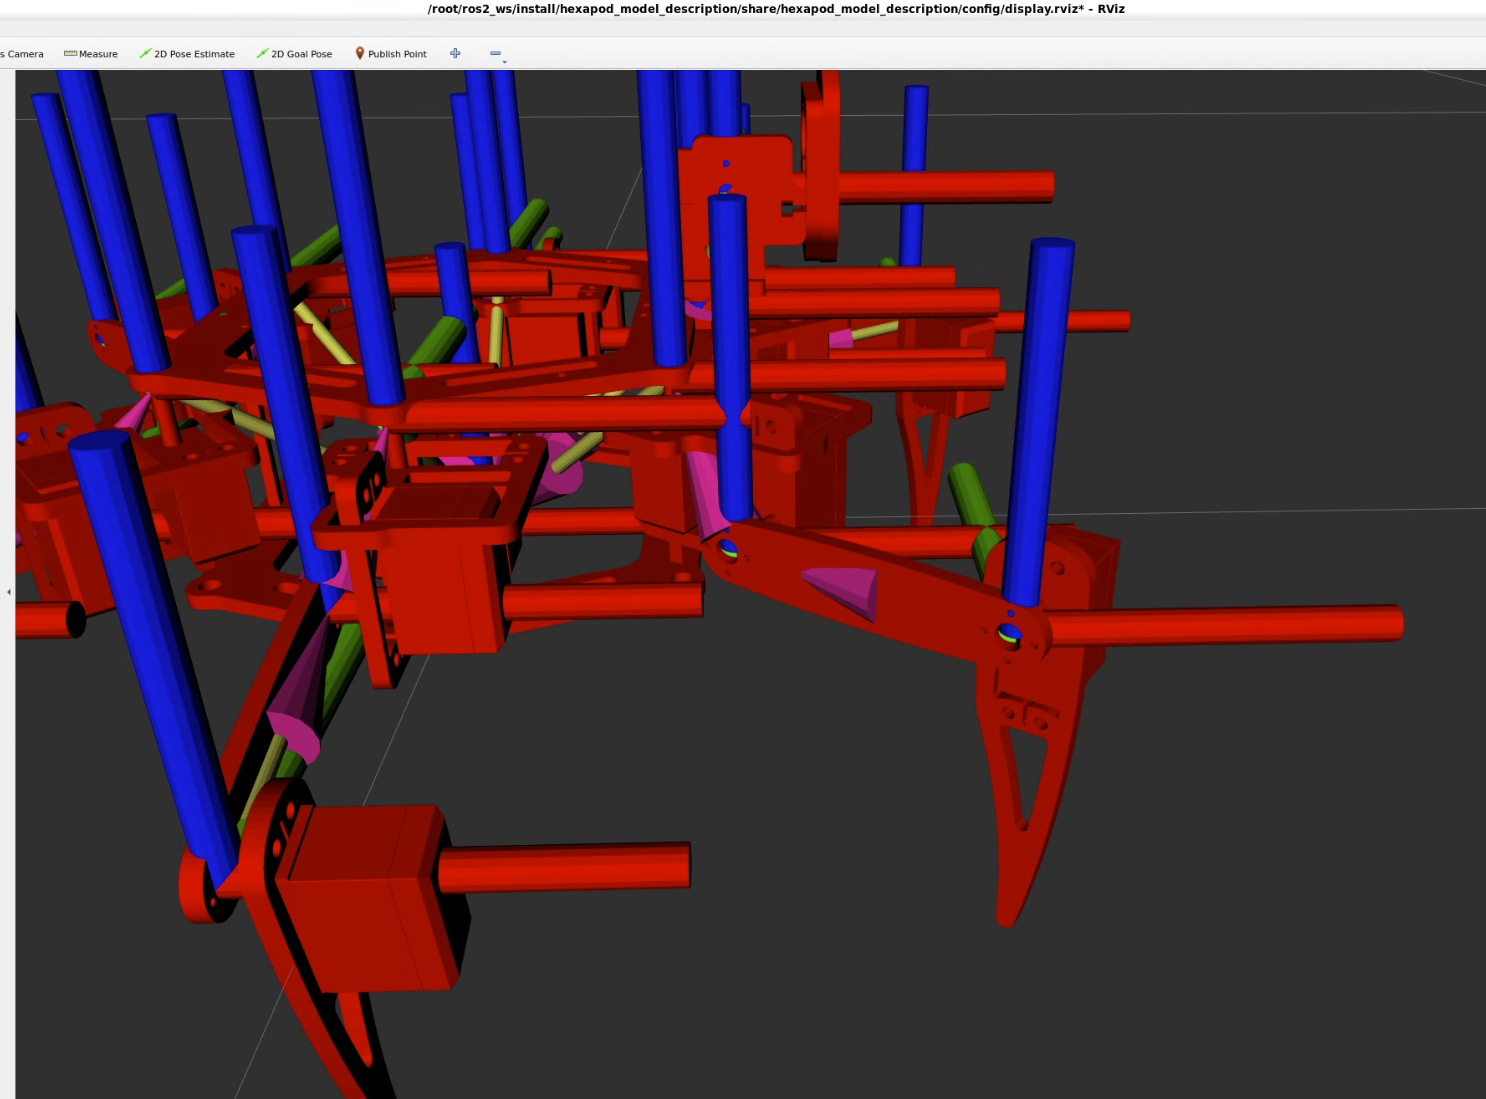
As you can see the model should have the Axis at the joint locations. The joints should move as they do in Fusion, and if they don’t, then somethings wrong. There were a few extra values I had to insert into the exported URDF xacro file - such as changing the joint types from continuous to revolute and adding min/max ranges (in radians)
GazeboSim Hell
Setting up Gazebo Sim has been the hardest part this week. I’m really trying to go full virtual. What I mean is setting up a ‘Sim mode’ where Gazebo Sim is used as ‘the hardware’ instead of a Raspberry Pi hooked up to a bunch of servos. There are so many advantages to having a fully simulated setup like, unlimited robot battery life, ML/AI training, less wear-n-tear on the robot. But unfortunately, I am hitting a wall with configuring Gazebo Sim because all the tutorials and documentation I find online are mostly for Gazebo Classic and the migration guide doesn’t really talk about setting up services (which I think I need to set up a similar SetServo like I have in pi_control). [Spoiler!, turns out I didn’t need to set up services for Gazebo Sim - Solution below]
there was also an issue with Zenoh Router while the Router is off, so I had to deconfigure my environment for Zenoh and set my network=host.
I implemented a JointPublisher to behave the same as pi_control, but what I think I’m missing is setting up topics with the same manner and convention as I do in pi_control. And that’s difficult because Gazebo Sim has it’s own naming conventions. [Spoiler! those are called namespaces, and they’re useful but not required - Solution below]
For now I’m able to spawn the model, either fully rigid at 90 deg, or fully limp, like a pile of parts on the ground. But I cannot get the model to respond to Topics or Services, it’s driving me mad! [Spoiler! I ended up getting away from the problem for a bit, went on a run, worked on the garden, before coming back and figuring it out - Okay, now for the Solution!]

So after smashing my head into the problem for another half a day I decided to take a big step back.
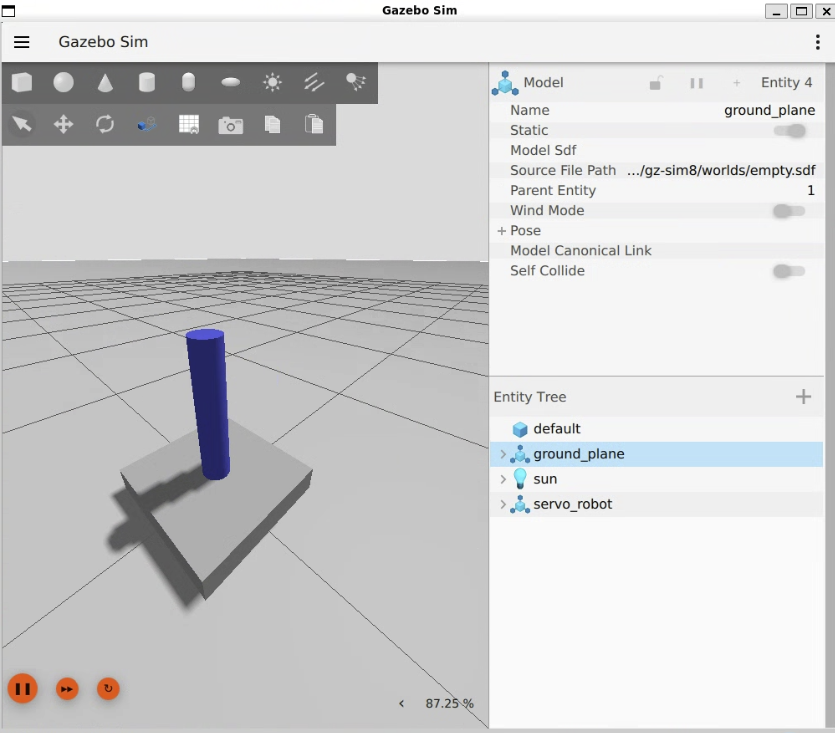
A New Strategy
I started a much smaller project with only one joint. Essentially, shrinking down the complexity and make it easier to try new things. I built the mini project pretty quickly, having wrestled with the hexapod project for a while. This allowed me to build the simulation without worrying too much about the networking aspect. With Gazebo Classic being phased out and Gazebo Sim just coming in, there is a lot of older documentation out on the web that is misleading.
It turned out, the main problem with my setup was using the correct plugin names, finding and downloading all the correct packages, and the structures for the supporting config files (controllers, bridge, xacro) and finally setting up the launch file to use the right parameters.
Bring in the Middle
Finally 😊 WSL, Docker, ROS2 Jazzy, Gazebo Harmonic all integrated and in total control. The only problem now was how to reintegrate Zenoh and get that working before spinning things back up into the Hexapod project. At first, things were looking like Zenoh might not be compatible, but that was only because I wasn’t using https://github.com/eclipse-zenoh/zenoh-plugin-dds plugin. And, zenoh_bridge conveniently has a docker image I could just load into my Dockerfile. After verifying this update fixed the network issues, I was ready to integrate back into Hexapod.
Next Steps
After applying all the lessons learned, packages, and configurations, I now have the Hexapod in Gazebo responding to commands from my new Command Display. The materials are kind of messed up and makes the robot hard to see in Gazebo. The controls need lots of love, but now that I have a real sim, I think I’m going to dive into the kinematics 🤖! I also still need to design and print or cut the mount for the real-sense camera. I also now need to integrate the Realsense sensor messages into RViz/Gazebo. See you all next week!