Welcome!

Big Win! Then Twists and Turns, Some Stalling Out, and Then Another Small Win!
TL;DR; - Digital Twin is 80% complete. I have the Jetson Up and Running and now the ROG Ally as the Windows Controller machine.
Digital Twinning:
This all started when I realized the importance of creating a digital twin, and doing it sooner than later. Designing the robot bottom up in fusion 360 seems like the next logical step. Then I remembered, at work, our analysts reach out to commercial partners for high-fidelity models to save time and effort. I decided to reach out the manufacturers of the robot and they sent me a zip file with a STEP file that has the robot modeled. Talk about success! Although this a definitely a win, I still have to learn how to design joints in fusion and then export to a URDF, but should be too hard either. I’ll have to establish a coordinate frame to live with and that makes most sense for controlling 6 side-by-side legs. I’ll reference the open-source code from the kit but I suspect their v0 Frame Of Resolution (FOR) is going to be the MPU FOR. Also I updated the names of the parts (they were in Chinese?) and simplified the model (removed parts like nuts and bolts not needed for simulation). I also removed circuit boards and devices since they likely won’t be needed for sim either. Here’s the model I ended up with and the link to download from my google drive.
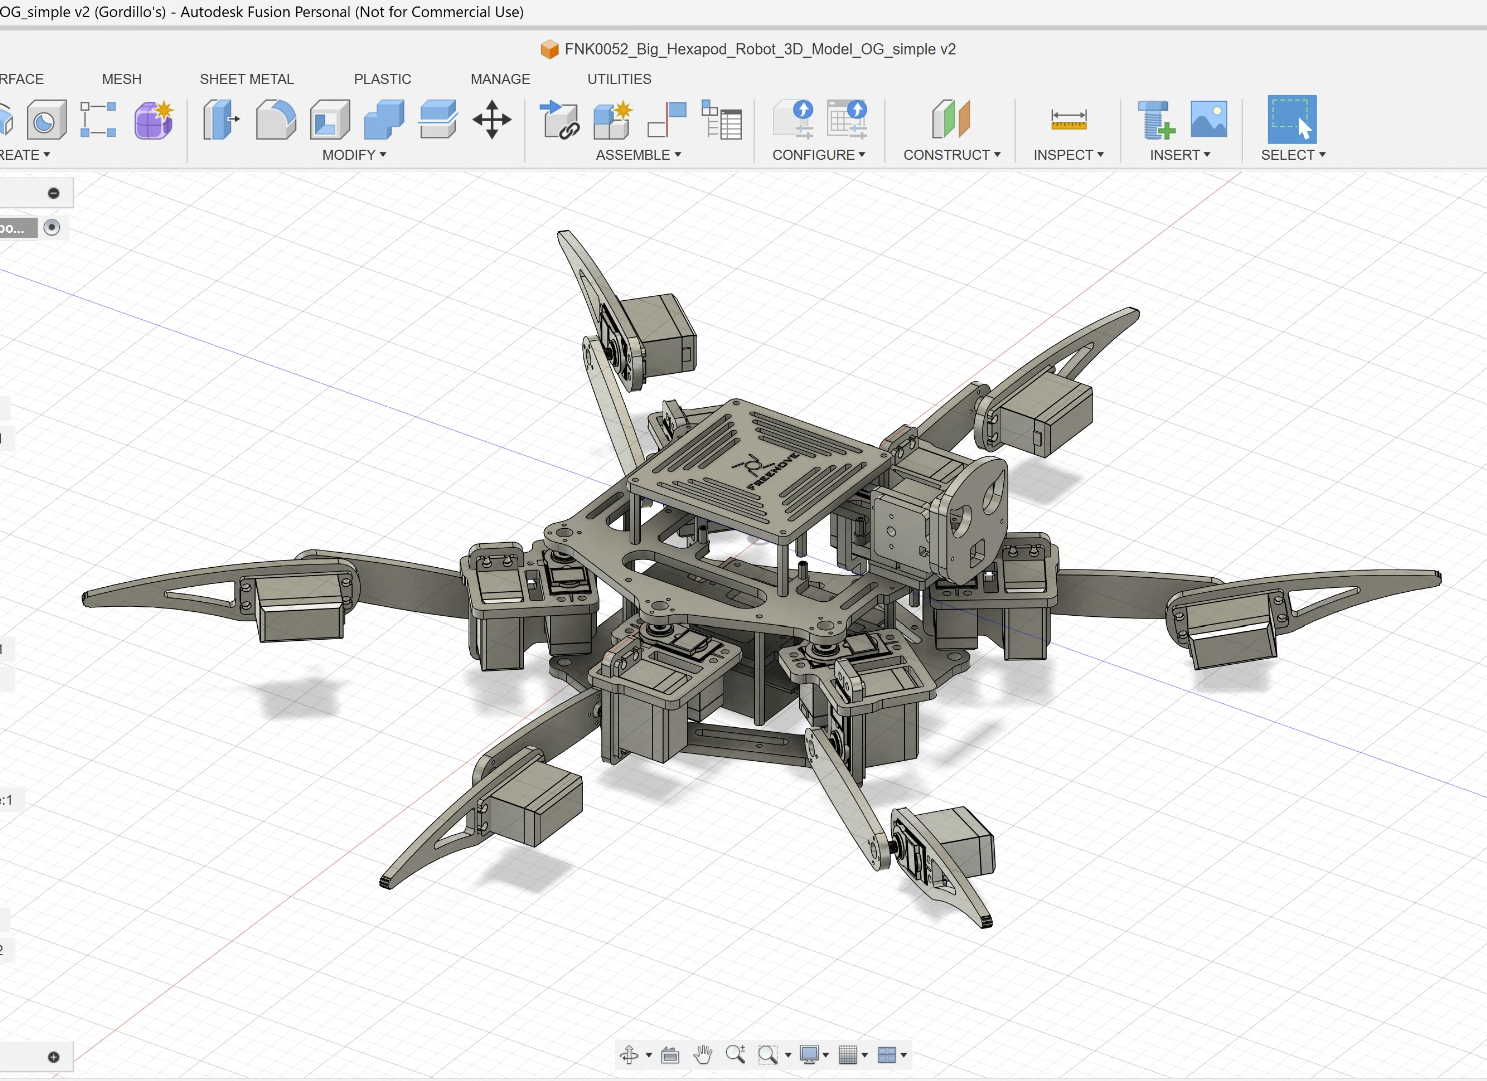
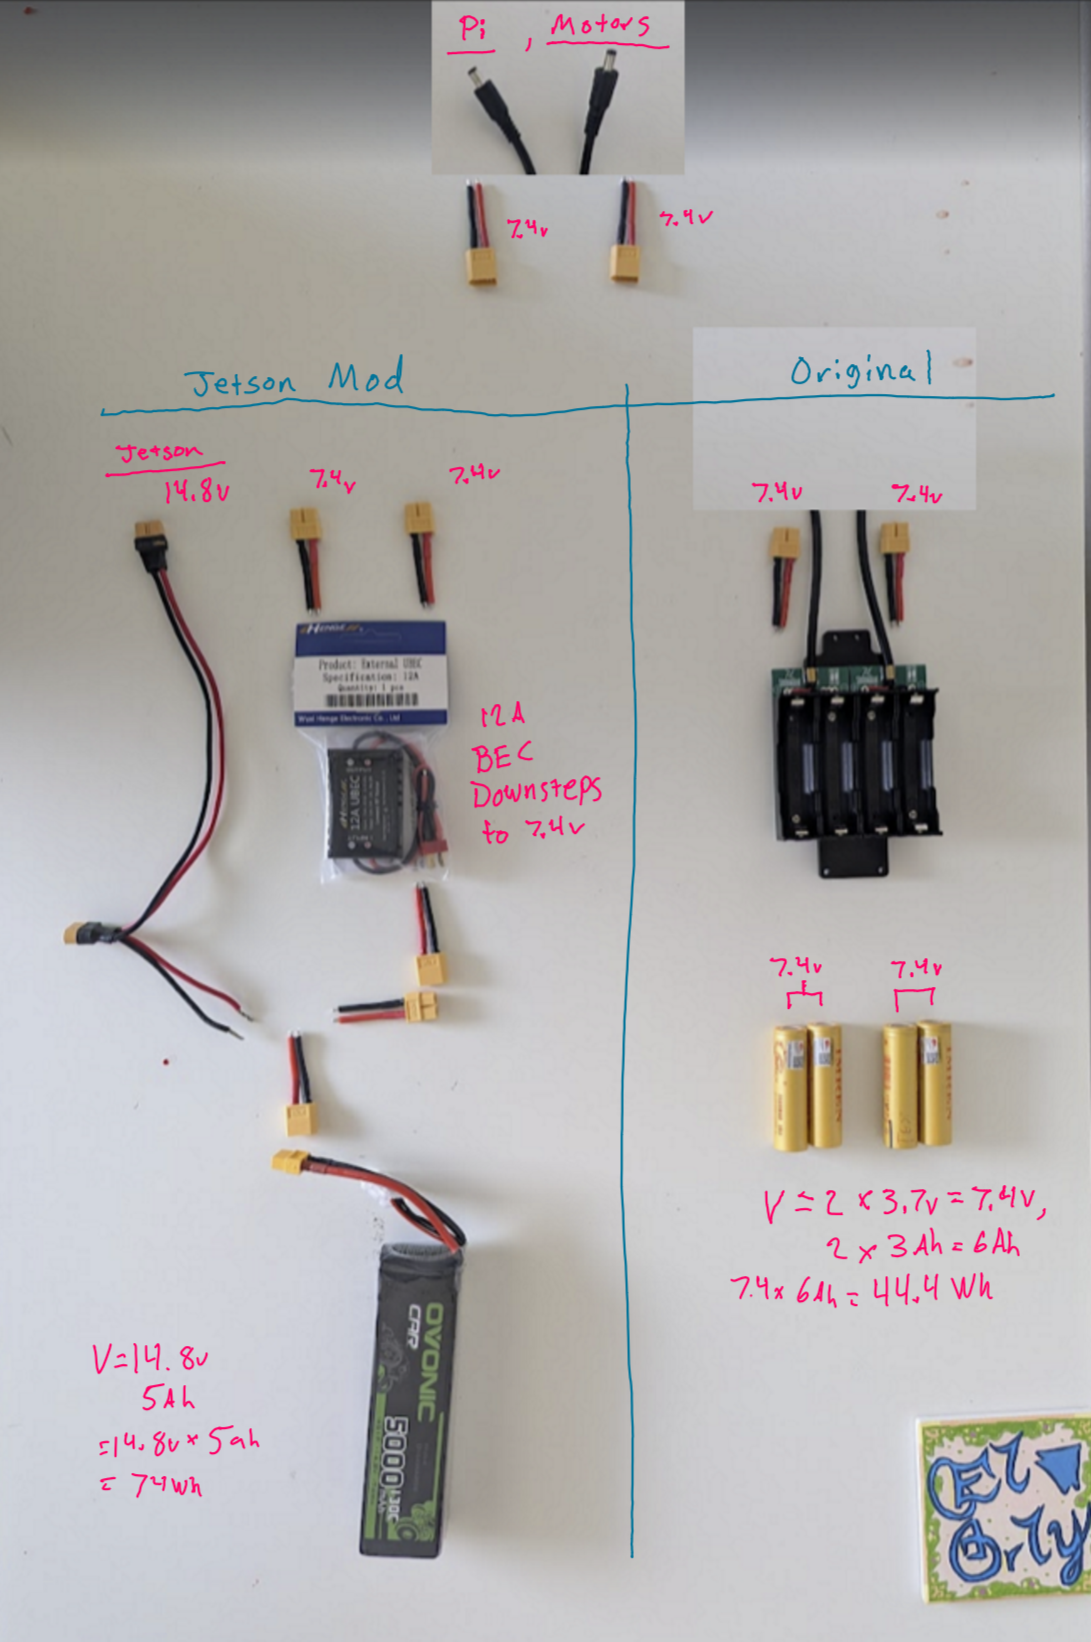
I do plan on adding a RealSense D435 sensor model and designing mounts for it and new 4S battery and BEC. I also came up with the following power plan for the robot that I need to solder together to double check it works.
Thinking ahead about Simulations:
Now for the part of the story where the multiple rabbit holes starting appearing everywhere.

I started thinking that my robot, once digitally cloned, will be eventually be training in a simulation. There are many options now a days. Isaac Sim would be ideal, but my Jetson TX2 is too old and too weak to run Isaac Sim. The best I could do is run Gazebo, I think?
Ruh-Roh - My TX2 is out of mem!
So in order to be sure if TX2 can run Gazebo, I spun up the TX2 to see what I was working with and it quickly spiraled into a mess. My TX2, on the Orbitty carrier board, was using very limited eMMC memory. With Jetpack, Docker, packages, I was at 91% usage. Trying to install a single container would not fit, let alone all the packages and models I would need for simulation. Luckily I found this orbitty article about booting from SD
Make and Bake - WSL Kernel
Okay, so a path through the woods on the Jetson, just switch to boot off of SD. I recently buried my Linux laptop due to a puffy battery. I didn’t want to go through the hassle of setting up an Ubuntu 18.04 Virtual Machine when I have WSL at my finger tips now. I loaded up the image into WSL and tried to mound my SD card when suddenly things fell apart. Turns out WSL doesn’t support mounting USB, SD, etc. that isn’t ext4 FS (external drive). Documentation on that issue is here
So I found this work around * Spoiler!, this was a mistake! This work around walks the user through building the WSL Kernel, modifying the make receipe (enabling iSCSI modules), and mounting the drive through TCP/IP haha nuts right? but this apparently worked (back then!)
After a day, of building and rebuilding the WSL Kernal due to version incompatibilities and random errors here and there. I was about to give up and just install a Virtual Machine viewer and go that route.. Until, I found this more recent workaround
usbipd-win as far as I can tell, is sharing the mounted device via a very similar tcp/ip method. But it works out of the box without the need to build the WSL Kernel. Phew! I was able to flash the Jetson TX2 using WSL2 using the Ubuntu 18.04 image. Win! or maybe not since I lost about two days here haha.
VSCode - no bueno
I loaded the Jetson back up and tried to install VSCode. Remotely it’s a no go because VSCode because of course Jetlife 4 and Jetson TX2 are End Of Life (EOL). so it’s not like I can VNC into the Jetson and run VSCode local on the device either becaaauuussee, although an arm64 processor, the arm64 deb package fails to build due to out of date jetpack installed libraries. Making VSCode from scratch also doesn’t work because it requires Nodejs > v22 (which is possible through npx) but incompatible with those same libraries that are required for installing the arm64 VSCode.
I hate being told that I can’t do something because they tried and failed. So please, if you feel absolute need to install VSCode onto your Jetson TX2 and find a way, all the more power to you and you can have the satisfaction knowning that I’m peanut butter and jealous. I found a different can groovy alternative using vim (yes vim) and plugins.
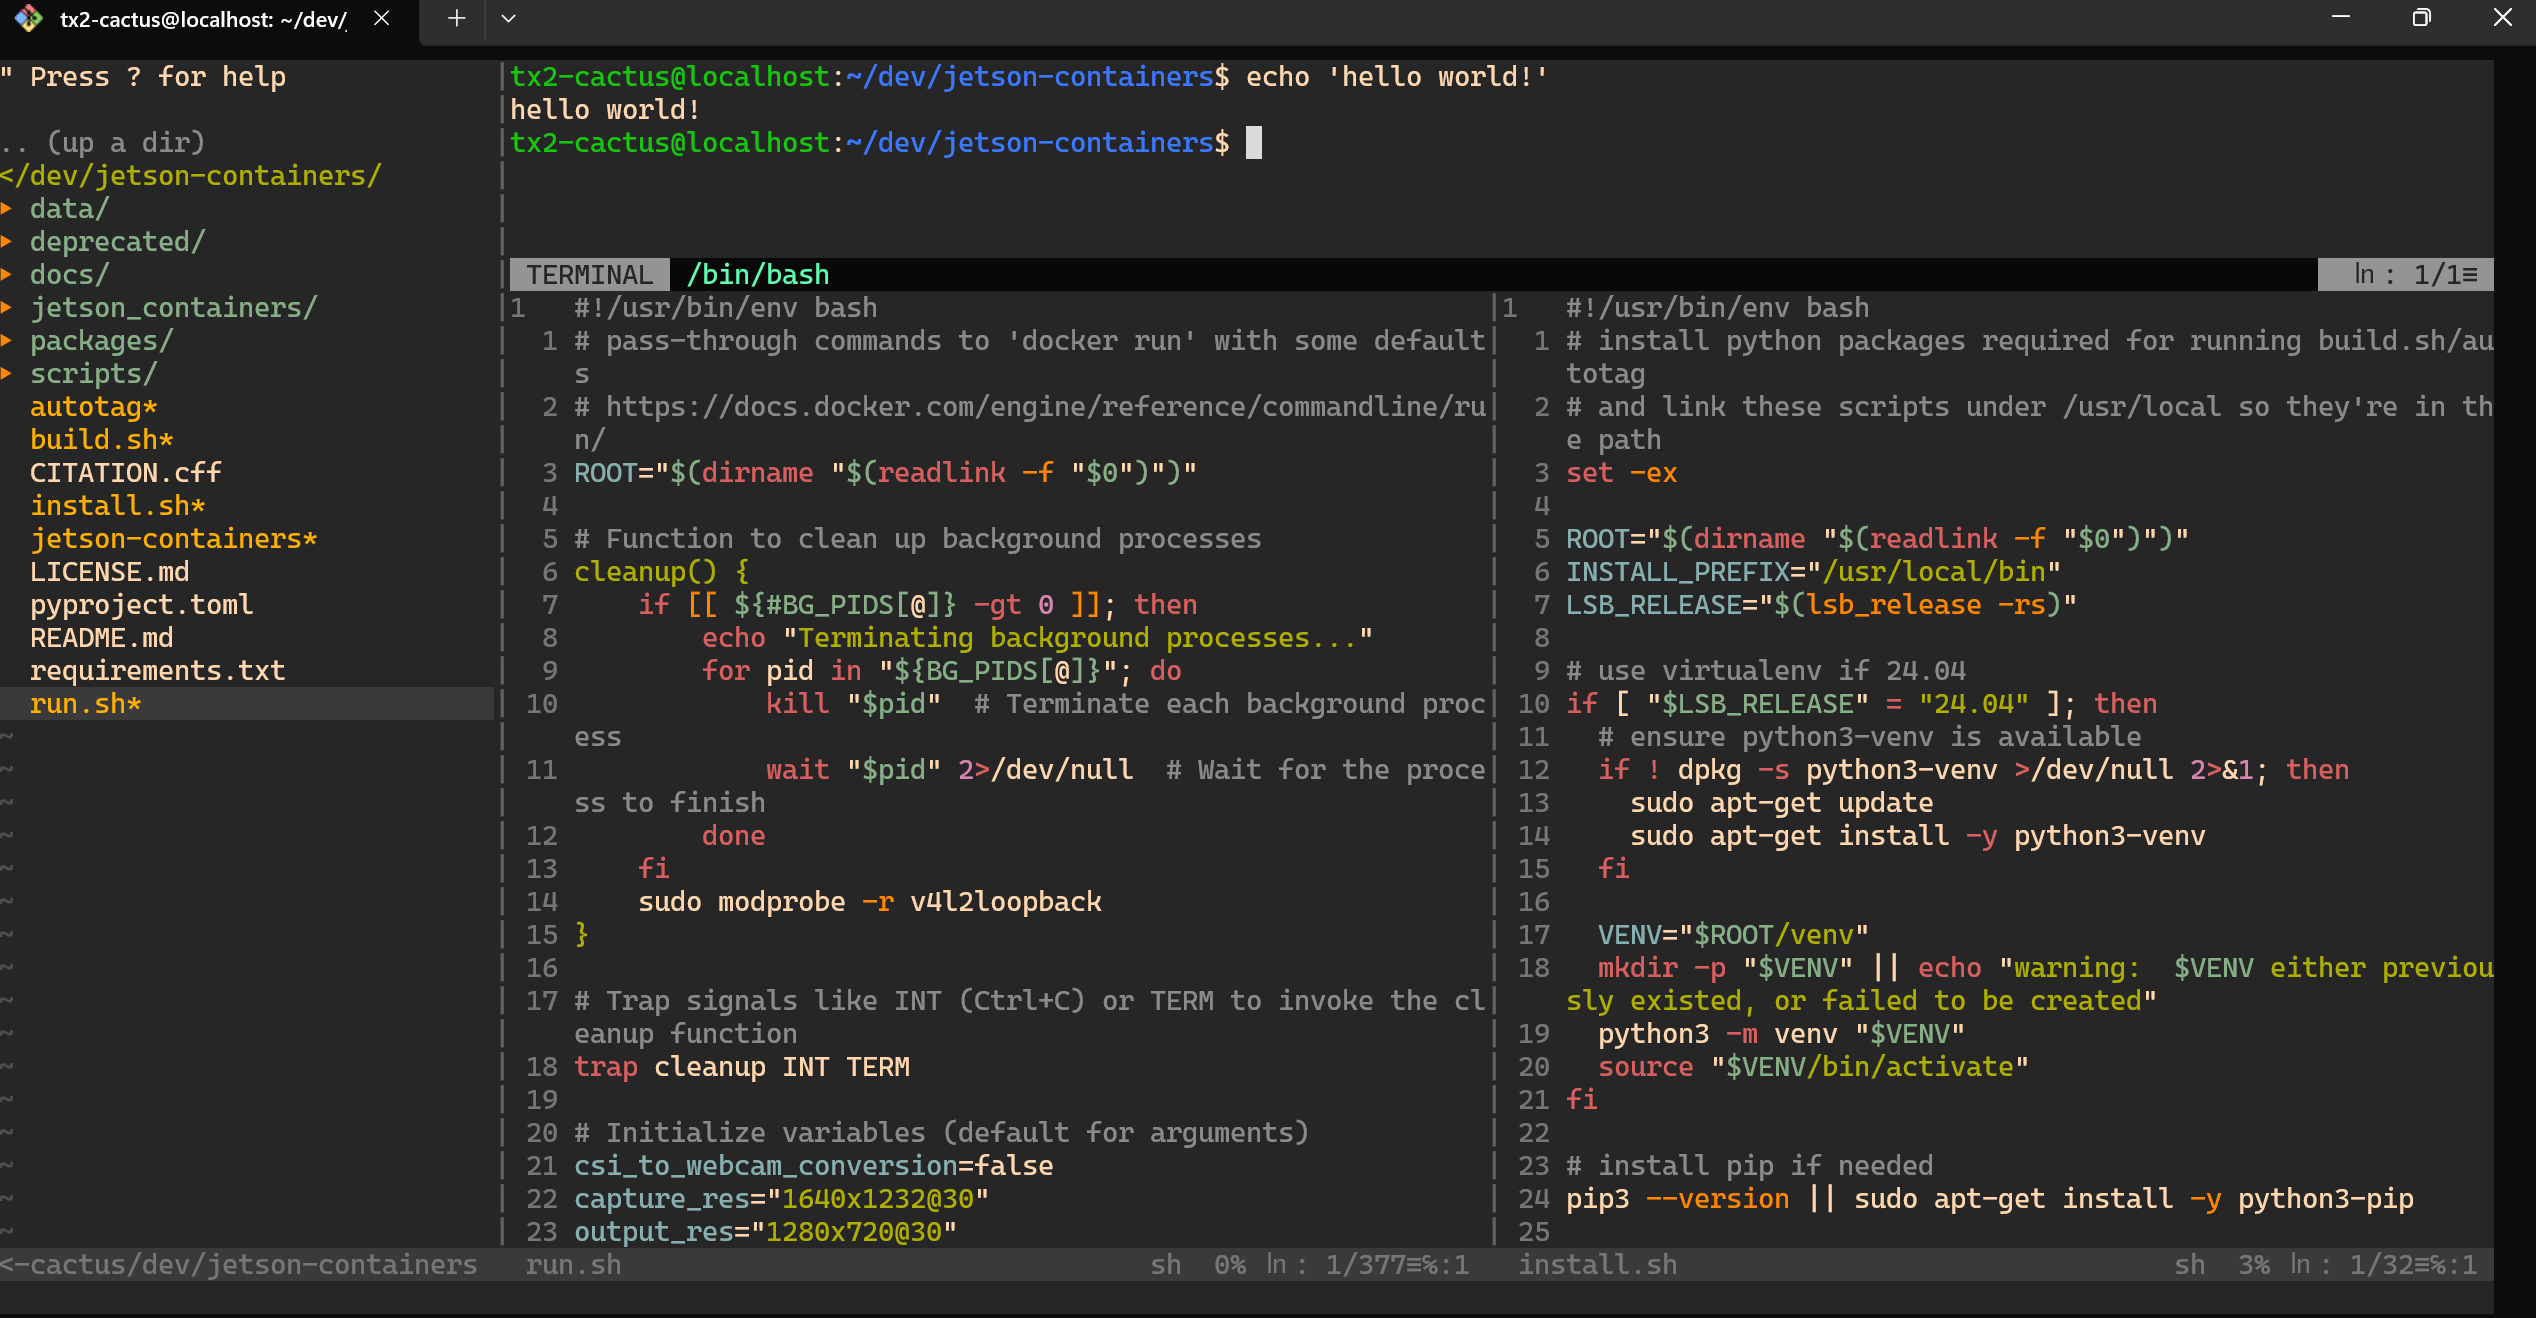
Old-school - New-school VIM (with plugins!)
Turns out that vim with plugins can make the workflow very VSCode like. Things like code completion, finding method declarations are possible. Running a mouse responsibe UI file directory and side by side code is possible. Check out my setup (in a simple ssh terminal!!) also it’s fast as hell. Way better than a laggy VNC connection to run VSCode imo. My only peev is how late I am to the game in this vim workflow.
A New Challenger has Appeared!
In all of the chaos of the Jetson TX2 setup, I started asking if maybe the edge computing device is the wrong place for training AI models (the answer is a strong resounding yes). So I started to count the GPU’s in my house and remembered my gaming device - The ROG Ally that I currently use as my media tv device (it makes quick work of streaming 4K). The ROG Ally has a decent AMD GPU that is not compatible with Isaac Sim, but can definitely be leveraged by Gazebo and accessed through WSL (with some updates and mods of course (and at this point, which part of the project doesn’t require updates or mods)). Another huge win for the ROG Ally is the built in hand controller which I can imagine would be sweet for robot control. The more I thought about it, the better it got. The only small wrinkle I found was the ROG Ally is terrible to code on. It has no keyboard or mouse and requires ext monitor. But this is quickly fixed by remote connecting via my laptop. Oh an another huge win is the Ally is much better for Computer Aided Drafting (CAD). So the decision was final, my ROG Ally is now set to become my new windows_control ROS component!
Next Steps:
Now that the Jetson TX2 is alive and well, and no longer has to worry about running sim training (yes, I’m still salty about the time lost exploring this viability, but I guess it had to be done?) I can focus on setting up the docker containers, depth sensor and streaming it over to windows_control.
The other part of the project I can work in parallel is setting designing models for mounting the new required hardware for the jetson. These will likely be 3D prints at first, but I did get my hands on some acrylic and I’m going to learn how easily I can, or cannot, pivot from 3D printing to laser cutting using Fusion. Stay tuned for more!